Rob Davidson - Maker
Knives From the
Texas Hill Country
Since 1978
830-798-7744
|
Rob Davidson - Maker Knives From the Since 1978 830-798-7744 |
|---|
|
Rocket Knives Tutorials
|
|
This page is
created for those that have been wanting to know
|
Please keep in mind that this is only one way of very many ways to |
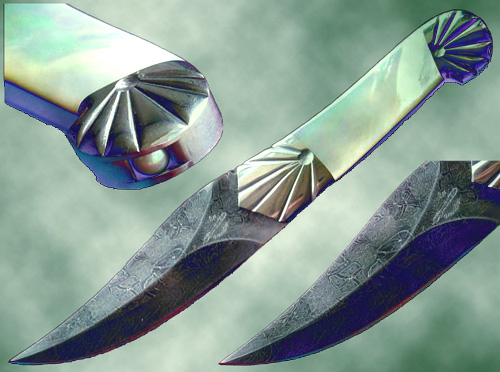 |
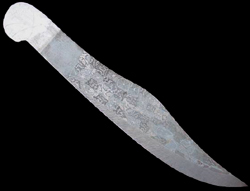
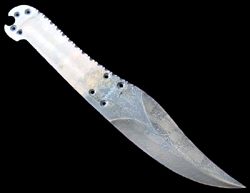
I have chosen a piece of mosaic damascus steel for this project. The above picture shows the finished piece. |
 |
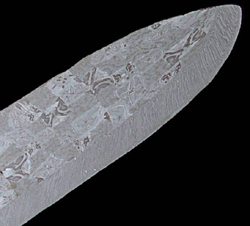
I have started with a billet of |
| This shows a close-up view of the damascus billet. Notice the mosaic base with the welded "twist" damascus edge. This twisted part of the billet is the part that is the most readily hardenable. |
|
 |
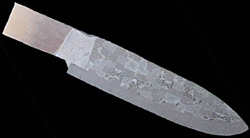
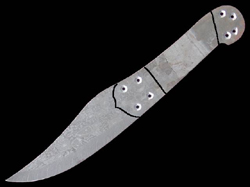
The billet is profiled. Please note that A LOT of time was taken in layout of this piece. I had a pretty good idea of what I wanted to accomplish before I started sawing this blank. Generally speaking...the more time that you spend on layout and "getting it right" the first time, the smoother your project will go. You obviously don't have to use this particular pattern. Imagination goes a long way here. |
| Next is the location of the bolsters. This is necessary because the holes can't be drilled once the blade is hardened. An outline of the bolsters are drawn on the blank and holes are made to accept the bolster material. |
 |
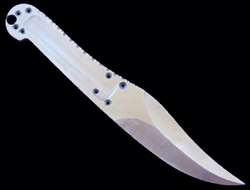 |
The blank has been surfaced flat and the |
| All machining and grinding are finished and the blade is heat treated. Damascus steel is very easy to heat treat and is also very forgiving. The blade is quenched in oil and is ready for clean-up and attachment of bolster and handle material. |
 |
 |
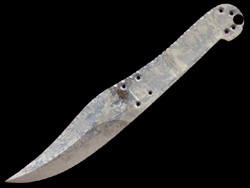
All heat treatment scale and coloring are |
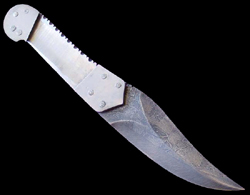
| Bolsters are sawn out, dovetailed, drilled and mounted to the blade. The bolster material is stainless steel. The matching pins are heavily peened to fill the hole and hold the bolsters securely in place. The blade is now ready for handle scales. |
 |
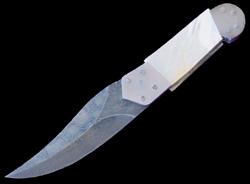 |
I have chosen mother-of-pearl as a handle material for this project. The scales are dovetailed to fit inside of the bolster margins and are glued in place. Remember the hollow spot ground into the tang? That is to hold glue. It is also a good idea to make a similar groove into the backside of the handle material. |
The handle scales are ground down to the |
 |
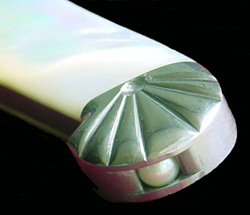 |
Remember the extra large hole drilled into the tang of the blank blade? That hole was to accept a Murata pearl from Japan. The bolster is carved into a clam shape to finish the motif. |

|